Sew Along - In & Out Hearts Pattern
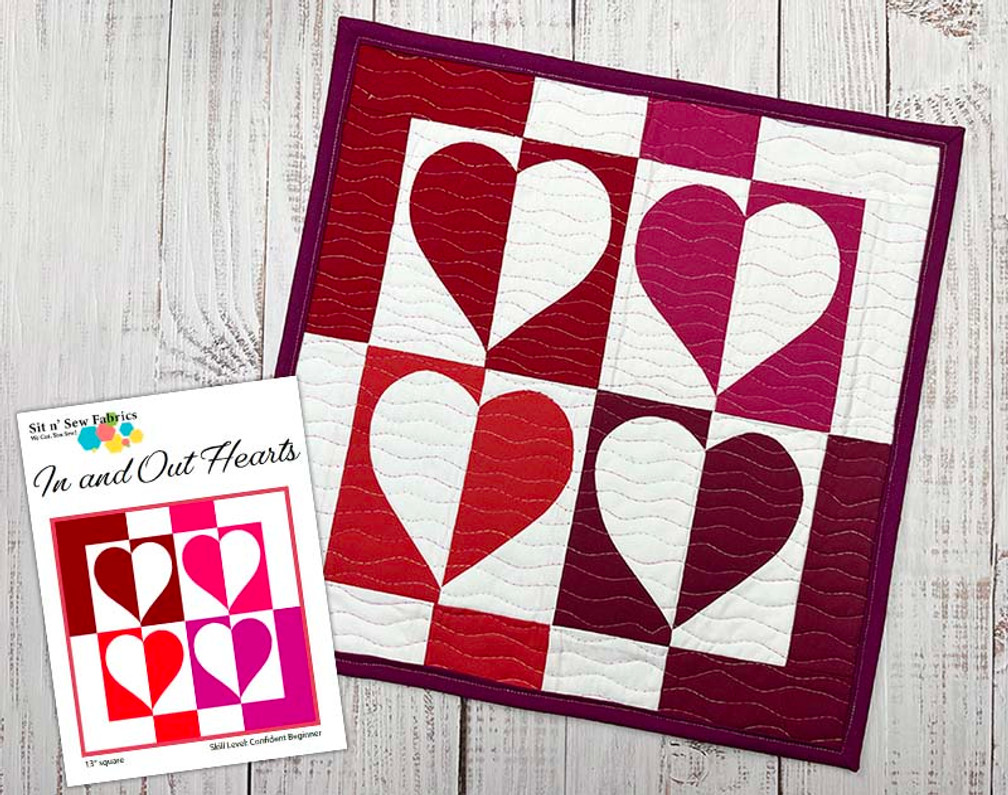
Valentine's Day is coming up and we've got the perfect project for you! I designed the In and Out Hearts pattern to help you create a sweet and heartfelt small quilt. Make two - one for yourself and one to give to a loved one!
Ready to make this heart cutie? Choose a FQ bundle (check out the pinks and reds below!), download the free pattern with your purchase, and use the tips in this email to make your quilt.
Follow along with these tips to make your sewing process go more smoothly! And maybe eat some chocolate hearts while you sew...
Tip 1: Mark your templates
We're making two heart blocks and two heart blocks in reverse. That means that it's easy to get mixed up with which heart parts to cut and which to fuse. As you trace the templates, shade the areas you're fusing with a pencil. That way you'll know exactly which pieces to keep and which to set aside.
Tip 2: Cut Carefully
After you've fused your templates onto your red/pink squares, it's time to cut. Start out by cutting down the middle, separating the heart in half. Then cut each half to create your heart half and heart background half (the shaded pieces). And...save the remaining half heart and heart background pieces for an additional block!
Tip 3: Fold and Fuse
Press the white background square in half to mark the center line. Start by fusing the heart background in place, positioning it along the center line. Then arrange the heart half so it touches the creased line and fuse it in place as well.
Tip 4: Join the Blocks
When you join the block rows, make sure the seam allowances are pressed in opposite directions (Hint: Press away from the fused edge). This will help your seams nest and and reduce the bulk as you assemble the blocks.
Here's what your finished blocks will look like. You can secure the applique edges with a zig zag or other decorative stitch at this point, or just wait until quilting and stitch them down then.
Tip 5: Go Scrappy!
You don't have to match up the colors in each block - mix them up to make your mini quilt playfully scrappy.
Tip 6: Lay Out Your Borders Before Sewing
This pieced border is easiest to assemble when you lay it out first. Make sure your colors are in the right spots (see the Layout Diagram in the pattern), and then sew the pieces into side and top/bottom borders.
Tip 7: Choose Your Thread
A small project like this is a perfect place to experiment with machine quilting thread color. Here I've laid five color options across the quilt top. More subtle colors allow the quilting to fade into the background. Bolder colors help it stand out. I chose this variegated pink thread - so fun against the hearts!
Jan 23rd 2025
Recent Posts
-
Mastering Monogramming
Embroidery Tips & How-To Monogramming Basics Personalizing gifts and garments with machine-st …Jan 29th 2026 -
Valentine's Project - Quilted Postcards
Quilted Valentine Postcards Quick, easy, and SEW fun — these appliqued heart postcards are the swe …Jan 22nd 2026 -
A Fruity Fun Fat Quarter Project
Join me to turn a fat quarter bundle into a fun and fast-to-finish sewing project! A cheerful squa …Jan 8th 2026


