
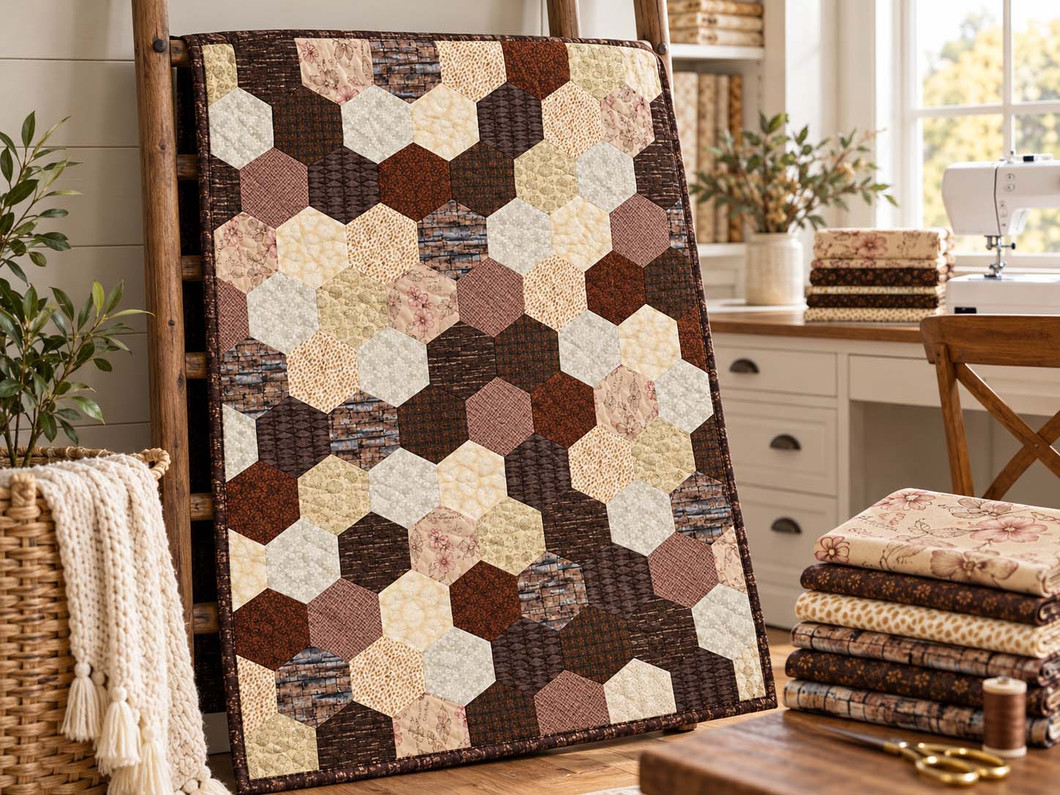
How to Make a Half-Hexagon Quilt: A Step-by-Step Guide
Free Quilt Tutorial
How to Make a Half-Hexagon Quilt: A Step-by-Step Guide
Key Takeaways: The Sit n' Sew Hexies Galore pattern uses 180 precut half-hexagons to create a 28" x 37" quilt. Arrange your fabrics, sew 15 strips, assemble the quilt top, and finish with quilting and binding. The half-hexagons are already cut for you!
Love the look of hexagon quilts but not the thought of cutting dozens of individual pieces?
With a Sit n' Sew precut Hexies quilt kit, the cutting is already done. You get to focus on choosing your fabric arrangement, sewing your pieces together, and watching that beautiful honeycomb design take shape.
This tutorial follows our Hexies Galore pattern and works with any Sit n' Sew quilt kit made using this pattern, regardless of the fabric collection.
Jump to a Section
Supplies and Finished Size
Finished quilt size: Approximately 28" x 37"
Sewing level: Medium
Seam allowance: 1/4" throughout
| Supply | Amount and Details |
|---|---|
| Precut Half-Hexagons | 180 pieces included in the kit |
| Binding Fabric | Included in the kit |
| Backing Fabric | Included in the kit |
| Quilt Batting | Needed separately |
| Sewing Machine | Needed separately |
| Basic Sewing Supplies | Thread, scissors, pins or clips, and other standard quilting tools |
Pattern: This tutorial follows the Sit n' Sew Hexies Galore pattern. Keep the original pattern handy for the assembly diagrams and trimming guidelines.
Ready to Try a Half-Hexagon Quilt?
Explore the warm browns, creamy neutrals, and earthy prints in our Fire Side Hexies Quilt Kit.
Step-by-Step Instructions
With your precut half-hexagons and sewing supplies ready, it's time to start creating your quilt!
Step 1: Arrange Your Half-Hexagons
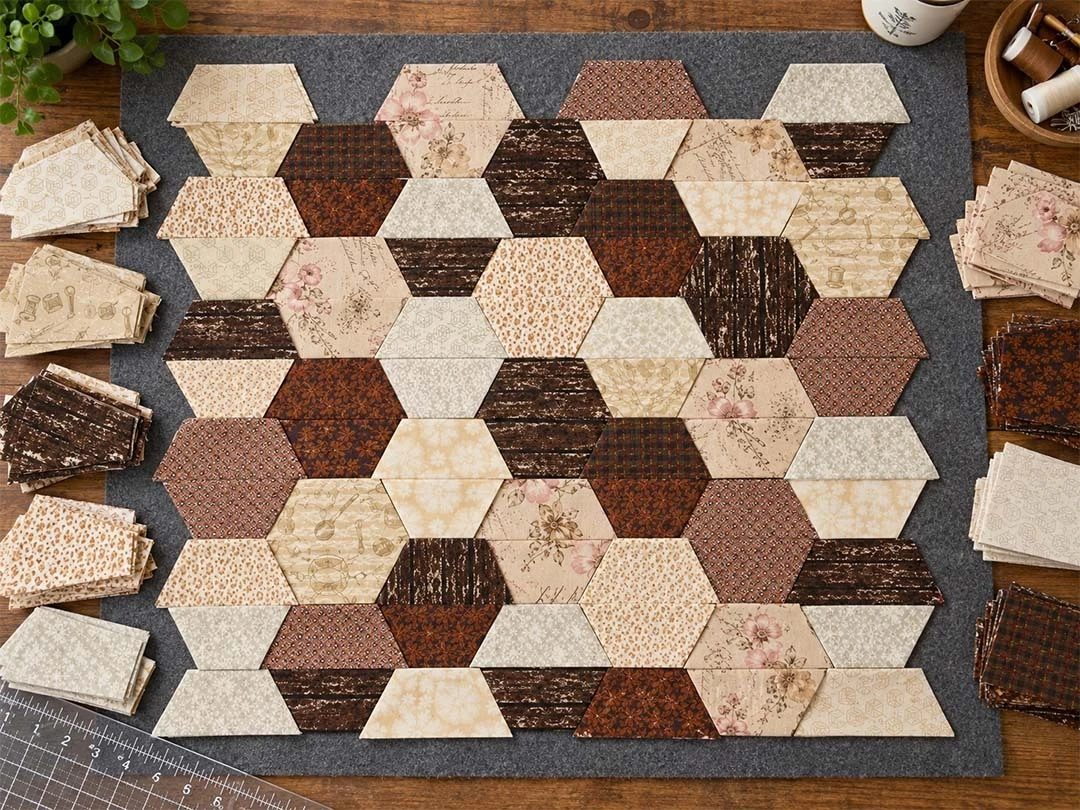
Start by laying out your 180 precut half-hexagon pieces in a pattern you like.
Try spreading darker fabrics throughout the design, alternating contrasting colors, or grouping coordinating prints. Move the pieces around until you're happy with the overall look.
Since the pieces are already precut, there's no need to cut each half-hexagon before arranging your quilt.
Tip: Take a picture of your finished layout with your phone or tablet before sewing. This gives you an easy reference for keeping every fabric piece in the correct order.
Step 2: Sew the Half-Hexagons into Strips
Following your planned arrangement, sew the half-hexagons together using a 1/4" seam allowance.
You'll create a total of 15 strips, with 12 half-hexagons in each strip.
Keep the pieces in their original order as you sew so your finished quilt matches the arrangement you selected.
After sewing each strip, press the seams in the following directions:
- Odd-numbered strips: Press seams toward the top.
- Even-numbered strips: Press seams toward the bottom.
Continue until all 15 strips are completed.
Tip: Keep your strips numbered or organized in sequence as you work. This will make assembling the quilt top easier.
Step 3: Clip the Small Fabric Tabs
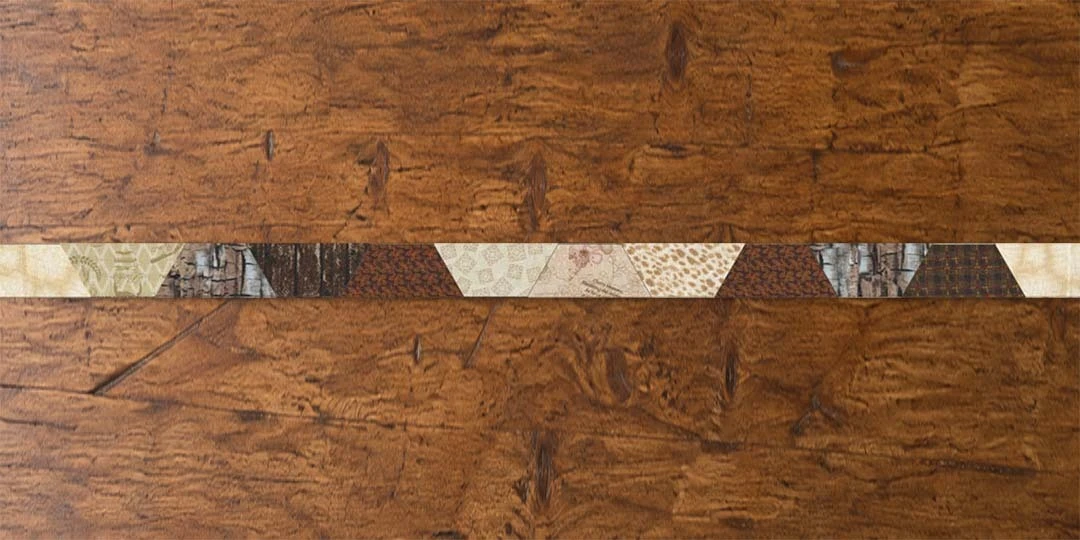
After sewing the half-hexagons into strips, you may notice small tabs of fabric extending beyond the seams.
Carefully clip off these little tabs once your strips are pieced.
Work along each strip, removing the excess tabs without cutting into your stitching.
Step 4: Sew the Strips Together
Now that all 15 strips are pieced, it's time to assemble the quilt top.
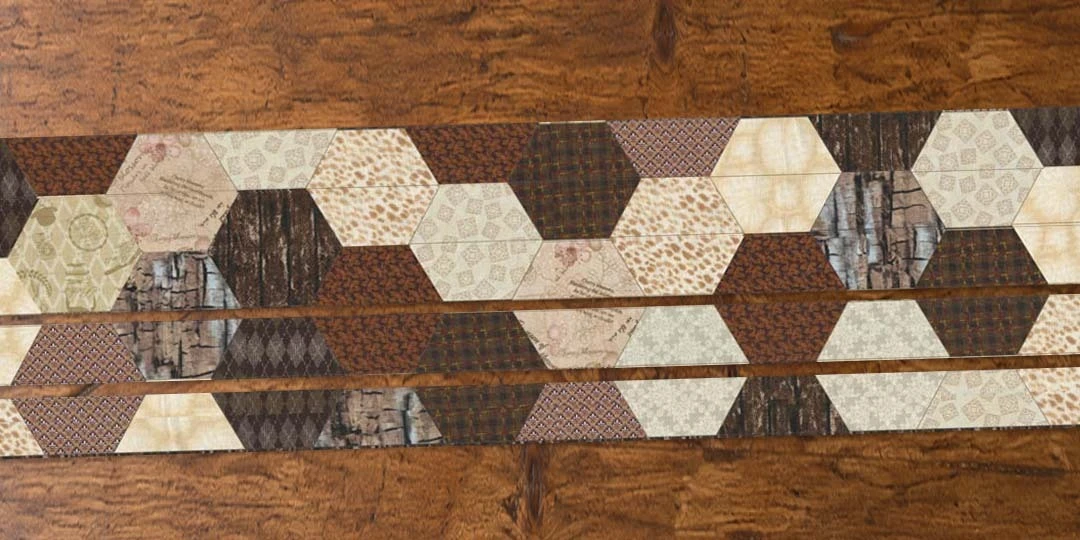
Begin sewing the strips together, making sure the half-hexagons line up where the strips meet.
Pay close attention to the alignment as you sew. This is where the distinctive honeycomb design begins to come together.
Continue joining the strips until the entire quilt top is assembled.
Once all the strips are joined, press the seams.
Tip: Take your time matching the half-hexagon seams. Proper alignment helps the geometric design look its best.
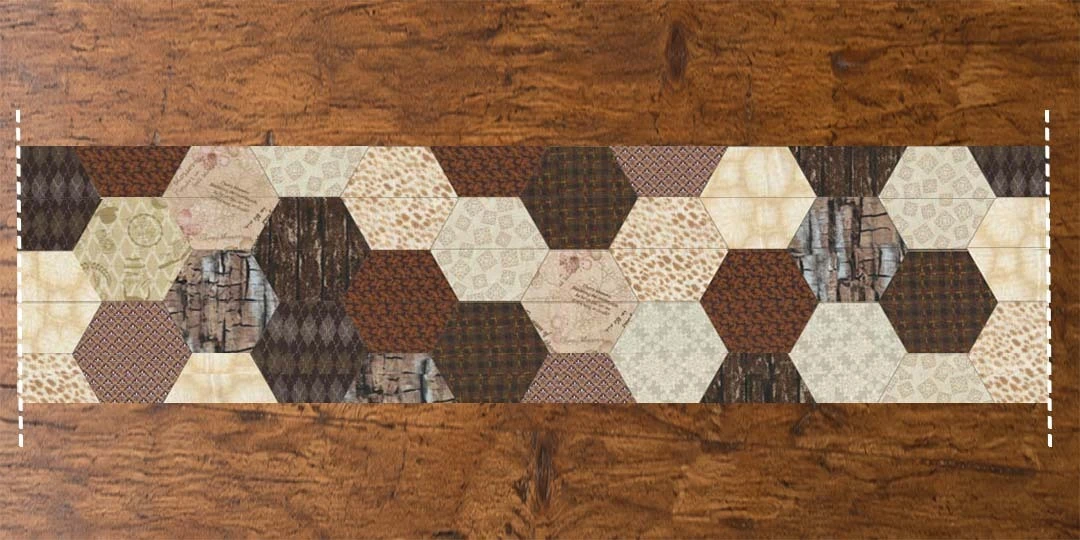
Step 5: Trim the Quilt Top into a Rectangle
Once all the strips are sewn together, the top and bottom edges of your quilt will have an uneven outline because of the half-hexagon shapes.
Following the trimming guidelines in the Hexies Galore pattern diagram, trim the top and bottom edges to make the quilt top rectangular.
Use your quilting ruler and rotary cutter to carefully make these cuts.
After trimming, your quilt top is ready for batting, backing, and quilting.
Step 6: Layer and Quilt
Your quilt top is complete! Now it's time to add the batting and backing.
Arrange your quilt into three layers:
- Backing fabric on the bottom
- Batting in the middle
- Pieced quilt top on top
Make sure the layers are properly positioned and secured before quilting.
Quilt the layers together using your preferred quilting design.
Whether you choose simple quilting lines or a more decorative pattern, the quilting stitches will hold the layers together and add texture to your finished project.
Step 7: Add the Binding
You're almost finished!
Take the binding fabric included in your kit and piece the binding strips together at their short ends.
Once joined, use the binding to finish the outer edges of your quilt.
The binding covers the raw edges and gives your quilt a finished appearance.
After securing the binding around your quilt, your Hexies Galore project is complete!
Enjoy Your Finished Half-Hexagon Quilt!
There's something satisfying about seeing individual fabric pieces come together into a finished quilt.
With a Sit n' Sew precut Hexies quilt kit, you can spend more time arranging fabrics, sewing, and enjoying the creative process instead of cutting every half-hexagon yourself.
And because the Hexies Galore pattern works with different fabric collections, you can create a completely different look while following these same seven steps.

Ready to Start Your Own Hexies Quilt?
Choose a precut half-hexagon quilt kit and spend more of your project time sewing.
Half-Hexagon Quilt FAQ
What is a half-hexagon quilt?
A half-hexagon quilt is made by sewing half-hexagon fabric shapes together to create a design that looks like rows of complete hexagons.
How many half-hexagons are in a Hexies Galore kit?
The Sit n' Sew Hexies Galore pattern uses 180 precut half-hexagons, sewn into 15 strips of 12 pieces each.
What size is the finished Hexies Galore quilt?
The finished quilt measures approximately 28" x 37".
Is the Hexies Galore quilt beginner-friendly?
The pattern is rated Medium sewing level. It involves sewing half-hexagons into strips, matching seams, assembling the quilt top, trimming, quilting, and binding.
Do I need to cut the half-hexagon pieces myself?
No. When using a Sit n' Sew precut Hexies kit, the half-hexagon pieces are already cut. You will still need to trim the assembled quilt top as directed in the pattern.
What seam allowance should I use?
Use a 1/4" seam allowance throughout the Hexies Galore pattern.
Does the quilt kit include batting?
No. The Hexies Galore pattern lists batting as a separate supply. The kit includes the precut half-hexagons, backing fabric, and binding fabric.
Can I use different fabric collections with this pattern?
Yes. The Hexies Galore instructions can be used with Sit n' Sew quilt kits cut for the same half-hexagon pattern, giving each finished quilt a different look.
Recent Posts
-
How to Make a Half-Hexagon Quilt: A Step-by-Step Guide
Free Quilt Tutorial How to Make a Half-Hexagon Quilt: A Step-by-Step Guide Key Takeaways: The Sit …Oct 28th 2026 -
Easy Scrappy Table Topper Tutorial with 5" Squares
Free Quilting Tutorial Easy Scrappy Table Topper Tutorial with 5" Squares Key Takeaways: Make a s …Oct 23rd 2026 -
Machine Embroidery Needles: Sizes, Types & How to Choose
Machine Embroidery Needle Guide Machine Embroidery Needles Explained: Sizes, Points & How to Cho …Sep 10th 2026