Finishing, Pressing, and Caring for Machine Embroidered Designs
Machine embroidery is a rewarding craft, but your work isn’t truly finished when the machine stops. As a seasoned embroiderer, I’ve learned that how you finish, press, and care for your embroidered pieces can make all the difference in their appearance and longevity. In this guide, I’ll share no-nonsense tips (with years of experience behind them) on properly finishing a machine embroidery project, pressing it without damage, and caring for it so it stays beautiful for years to come.

Finishing Your Machine Embroidery
Once the stitching is done, take a few key steps to give your project a clean, professional finish:
Remove the Stabilizer: Take the project out of the hoop and remove any embroidery stabilizer according to its type. Tear-away stabilizers should be gently torn off, cut-away stabilizers trimmed away with scissors, and water-soluble stabilizers washed out or moistened as needed. Always follow the stabilizer instructions to avoid distorting your stitches. (For example, cut-away stabilizer leaves a piece behind the design for support, while wash-away stabilizer must be rinsed out completely.)
Trim Excess Threads and Jump Stitches: Flip the piece over and carefully trim any long bobbin threads or jump stitches on the front. Don’t yank them—use a sharp embroidery scissor or snip to cut threads cleanly without cutting the fabric. A curved embroidery scissor can reach tight spots and snip threads or backing fuzz precisely, helping you clean up those random thread tails that won’t budge. This little bit of cleanup makes your finished design look neat and prevents loose threads from snagging later.
Tidy Up the Design’s Back: If the design was stitched on a garment, especially one worn against the skin (like a t-shirt or baby onesie), consider fusing a soft backing over the stitches. This covers any scratchy bobbin threads and gives a professionally finished look. For instance, you can iron on a product like Comfort Seal – a smooth, fusible “cover-all” backing that bonds to the back of your embroidery to keep it soft against the skin. I often cut a piece of this backing slightly larger than my design (with rounded corners), then press it on with my iron as per instructions. The result is a smooth backside that’s perfect for kids’ clothing or any item where you want a comfortable finish.
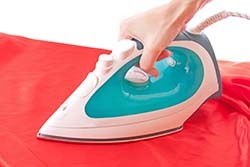
Pressing Embroidered Fabrics Safely
Pressing your embroidered piece is essential to remove hoop marks and wrinkles, and to set the stitches. However, improper ironing can flatten or even damage your embroidery, so follow these time-tested pressing guidelines:
Always Press from the Back: Turn your garment or fabric upside down so you’re ironing on the wrong side (the back side of the embroidery). Pressing from the front can crush the design’s texture and sheen. By pressing on the back, you protect the stitches – and if the iron causes any slight sheen or scorch, it won’t show on the front. For extra protection, lay the embroidery face-down on a fluffy towel. The towel provides a cushioned surface so the embroidered stitches sink in rather than get squashed flat.
Use a Pressing Cloth: Never place a hot iron directly onto embroidery threads. Cover the area with a pressing cloth (a clean cotton cloth, piece of muslin, or even an old pillowcase works well) before applying heat. The cloth protects your embroidery (and your iron) from any residual stabilizer or adhesive, and prevents the iron’s soleplate from catching on stitches. Pro Tip: I often use a lightweight pressing cloth dampened slightly – the steam helps release stubborn hoop marks while shielding the threads.
“Press” – Don’t Iron: Avoid the back-and-forth scrubbing motion of ironing, which can stretch or distort the fabric and design. Instead, press in an up-and-down motion. Simply lower the iron straight down for 10–15 seconds, then lift it up to move to the next section. This technique flattens wrinkles without dragging the stitches out of place. It’s one of the biggest secrets to keeping embroidery looking crisp (so remember: press, don’t iron!).
Low Heat and Test First: Embroidery threads (especially rayon or polyester threads) are generally heat-tolerant on low settings, but high heat can scorch or melt certain threads – metallics, in particular, are sensitive to heat. Start with a low temperature setting on your iron and increase only if needed. I also recommend testing the heat on a corner of the fabric or a scrap before pressing the embroidered area. It’s better to spend a minute testing than to risk a shiny iron print on your masterpiece. And never use steam on vinyl or metallic embroidery – you could end up with a shriveled design.
Ensure the Piece is Dry and Mark-Free: If you used any water-soluble topping or marking pen on your project, make sure it’s fully removed and the fabric is dry before pressing. Ironing over water-soluble pen marks can set them permanently, and pressing damp embroidery can potentially cause scorching or distort the fibers. So, remove any topper by rinsing or tearing it away as instructed, let the fabric air out, and only then proceed to press. A dry, clean piece will press much better and safer.
Following these pressing tips will eliminate hoop marks and wrinkles while preserving the gorgeous texture of your stitches. Take it from me – a little patience and the right technique go a long way to keep that embroidery looking as stunning as it should.

Washing and Caring for Embroidered Items
Whether you’ve stitched a shirt, a quilt block, or a set of towels, proper laundering and care will protect your embroidery through many uses. Here are some beginner-friendly but important tips for washing and maintaining embroidered garments:
Turn Garments Inside Out: Before washing, flip embroidered clothing inside out. This simple step shields the embroidery from direct friction in the wash, minimizing abrasion on the threads. It also helps prevent buttons or zippers on other items from snagging your stitches. (For items like embroidered towels or accessories that can’t be turned inside out, consider washing them in a mesh laundry bag for protection.)
Use a Gentle Cycle (or Hand-Wash): If using a washing machine, select the delicate or gentle cycle with cold water. Gentle agitation and a slow spin will clean the item without aggressively twisting or stretching your embroidered area. For very delicate projects, hand washing in cold water is even safer. In either case, avoid hot water which can cause embroidery threads to fade or fabrics to shrink.
Choose Mild Detergent: Opt for a mild, color-safe detergent when washing embroidered pieces. Harsh chemicals and bleach are a big no-no – they can weaken embroidery thread and strip color fast. A pH-neutral or gentle detergent gets your item clean while being kind to the threads and fabric. (Usually, the labels “delicate” or “hand-wash safe” on detergents indicate they’re suitable for embroidery.)
No Bleach: Resist the temptation to use bleach or strong stain removers on embroidery. Bleach and embroidered thread do not mix – bleach can cause threads to rapidly fade or even disintegrate. If you need to target a stain, use a mild stain remover on the specific spot before washing, and test it on a hidden area first. It’s far better to repeat a gentle wash than to ruin your beautiful stitching with bleach.
Air Dry Flat or Hang: After washing, air-dry your embroidered items. Lay garments flat on a towel (in their natural shape) or hang them up to drip dry. Avoid the clothes dryer’s heat, which can shrink fabrics, melt synthetic threads, or cause puckering around the embroidery – truly a disaster for your work!. Air drying is gentler and helps your item maintain its shape. If the item is heavy (like a quilt), support it well when drying so the weight of water doesn’t stretch the fabric.
Touch-Up Ironing (if needed): If your item is a bit wrinkled after drying, you can iron it with caution. As with initial pressing, turn it inside out and use a low-heat setting. Place a pressing cloth over the embroidery and press from the backside to smooth any wrinkles. Never iron directly on the embroidered side. Often, if you smoothed the item before air-drying, you might not even need to iron it at all.
Finally, when it comes to long-term care, store embroidered pieces in a cool, dry place away from direct sunlight (which can fade the colors over time). For cherished heirlooms or seasonal items, consider wrapping them in acid-free tissue or a cotton pillowcase for protection during storage. And if your embroidery is on something like a wearable garment, remember to also follow any specific fabric care instructions on its label.
By following these finishing, pressing, and care techniques, you’ll ensure your machine embroidery projects look vibrant and professional not just when they’re fresh off the machine, but after many wears and washes. These habits might add a few extra minutes of work, but trust me – your beautiful embroidery is worth it. Happy stitching, and take good care of those embroidered creations!
Recent Posts
-

Diamonds Galore!
Sit n' Sew Fabrics • Quilt Tips Let’s Talk Diamonds! Diamond quilts are beautiful to look at, an …Mar 6th 2026 -
")
Essential Tools for Embroidery Beginners (...and Novices)
Embroidery Troubleshooting Why Your Machine Embroidery Projects Aren’t Going as Smoothly — and the …Feb 25th 2026 -

Perfect Half Square Triangles
Sit n’ Sew Fabrics • Quilting Tutorial Half-Square Triangles (HSTs): 3 Ways + 1 to Skip …Feb 19th 2026